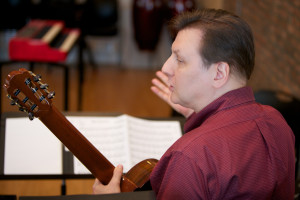
Two Voice Independence and Stretching Exercise #1
Download Two Voice Independence and Stretching Exercise #1 >>
This exercise is designed to aid in the development of independence when playing two parts, while helping develop physical strength and flexibility for both hands. The lower voice (beamed down) should be played with your thumb (of the right or picking hand), while the top voice (beamed up) is played A, M, I (i.e., annular, middle, index fingers). So obviously this exercise is intended for fingerstyle playing, but it can be played with a flat pick or with a thumb pick playing the lower voice, while the three remaining fingers (including pinky if you’re using a flat pick) play the top voice. And for those so inclined, it could even be played in its entirety with a flat pick (though not easily I concede, and not at all for the two variations on page 5). I have indicated left hand (fretting hand) fingerings only in the music of the initial exercise, and only then for the first time through each “cell” for reasons that should become obvious once you begin playing the exercise. Since the two variations on page five are based on the basic exercise and have only changes in the right hand fingering, there I’ve indicated these changes only.
The basic pattern or cell is set up in the first 6 bars (each 6 bar cell corresponds to the position in which it is played, i.e. the first cell is in 1st position, the second cell is in 2nd position, etc.). Upon completion of the first cell, the entire cell is moved up one fret to be repeated a half step higher in its entirety, before ascending one fret higher again for the next half step transposition… and so on, until you reach the point of turning round and descending. This covers the first two pages (i.e., bars 1 through 54). Go as high as you can up the fingerboard. While I’ve gone up to the 9th position, for guitars without cutaways, 7th or 8th position is a practical limit, and other instruments will accommodate the 12th position or higher. I’ve provided left hand (fretboard) fingerings for the descending cells beginning in 9th position only (bars 55 through 60), because these cells and their accompanying fingering merely descend by half steps in reverse order from the ascending part of the exercise.
On page 5 you will find two variations that are quite useful. (I’ve included possible right hand fingering/picking patterns for these two variations derived from the basic A, M, I, pattern used for the initial exercise). Variation #1 (bars 109 through 114) omits the 16th note rest on each beat of the top voice, requiring the thumb and annular fingers to play different pitches simultaneously. While variation #2 (bars 115 through 118) employs a device known as rhythmic displacement, in essence moving both voices in groups of three 16th notes spread over a continuous “four notes per beat” 16th note subdivision (until the last beat of each two bar pattern). Anyone that has ever heard Chuck Berry will recognize this rhythm, though he employed it for very different effect.
As with the basic exercise, each variation employs the fingerings indicated in each of the first ascending and descending cells previously used in the basic exercise, and should be played up and down the fingerboard ascending and descending chromatically.
For those who would like to hear them, below there are audio samples of me playing the first cell ascending and descending of the basic exercise (I play the descending version of cell 1 starting in the 6th position and move downward, though the written music begins its descent in the 9th position as referenced in the second paragraph above). There are also audio samples of me playing each variation (ascending only).
link to variation #1 ascending
link to variation #2 ascending
Good luck! I hope you find this helpful.
Ken


